ADVERTISEMENT
Techniques And Tips I Have Learned Over The Years
You know how the saying goes … “the only way you can get good at something is by doing it over and over again.” As we go through our careers as podiatric surgeons, we learn from our own mistakes, our residents’ mistakes and sometimes by trial and error.
I would like to share a few techniques and tips that I teach my residents. Often, we cannot remember how we picked up these tips. Certainly, I need to pay homage to my teachers from my residency in Tucker, Georgia.
Keys To Effective, Conservative Suturing
When it comes to closing wounds, we can remember our teachers telling us to conserve sutures and keep our hands close to the wound so we can work efficiently. You will have more stability with less shaky hands and fatigue. When closing deep layers that have some tension in the wound, two simple tricks to approximate the tissue margins without tearing through the tissues or breaking your suture include using three wraps instead of two for the initial tie of the suture. This will help reduce knot slippage. This is a lot easier than trying to use a hemostat to hold the knot.
Next, when reapproximating the tissues, do three or four maneuvers where you lift and pull to cinch down the knot versus just pulling the suture ends apart. This is when I say to my residents “up-down-up-down-up-down.” This technique is particularly beneficial when you are working in a deep wound.
 Pinpointing Optimal Locations For Osteotomies With Intraoperative Fluoroscopy
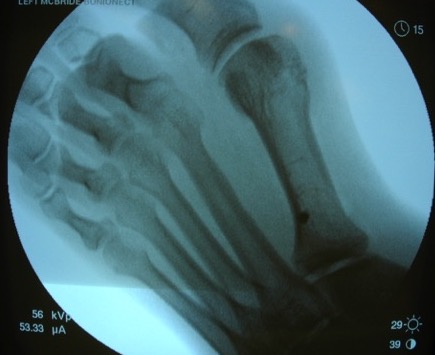
Using intraoperative fluoroscopy is not just for facilitating fixation techniques such as using a cannulated screw, it can also be beneficial in locating ideal locations in bones for osteotomies. Getting this bull’s eye view is a great technique to give you a precise location of the bone that you are viewing. The bull’s eye view occurs when the X-ray beam is exactly parallel to your metallic instrument or device. For example, let’s say we are doing a base wedge osteotomy for bunion correction. You want to be in the proximal metaphysis of the bone with the hinge near the cortex. You don’t want your osteotomy too close to the joint or too close to the cortex where the hinge could easily break. To help identify the exact location, use a K-wire and place it where the apex of the osteotomy will be, and by doing a bull’s eye view, you will see a dot (see the left photo above). This dot is exactly where the apex will be. If you don’t have a bull’s eye view, then it is difficult to really know where you are on the bone.
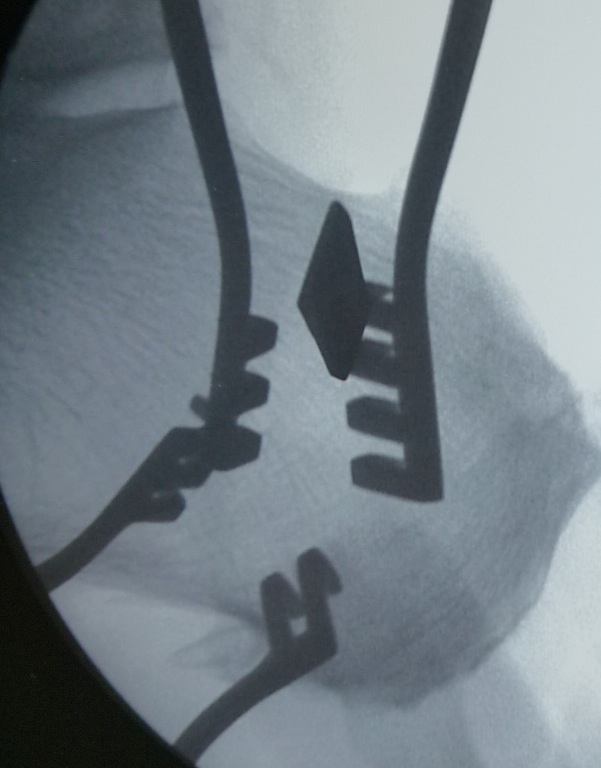
This technique also works well with an osteotome. For example, prior to making a calcaneal osteotomy, I will take the osteotomy, gently tap it in at the bone and then take a bull’s eye view. This will tell me exactly where I am on the bone to make sure I am not too close to the subtalar joint and that the obliquity is good.
Why Joint Spreaders Are Essential For Midfoot And Hindfoot Procedures
When performing arthrodesis procedures in the midfoot and hindfoot, joint spreaders are a must. In the old days, we used a baby laminar spreader with the teeth ground down flush. Today, there are a plethora of small joint spreaders available.
We know that the most important part of a successful fusion is not how much metal you put in there or a fancy biological with stem cells, but rather preparation of the joint. Non-unions are a real pain for us to manage and revision surgery is never an easy task.
In order to minimize non-unions, I have found that joint spreaders allow you to see the entire joint, especially the plantar-most areas of the fusion site. In a tarsometatarsal arthrodesis, for example, without a joint spreader, it is difficult to see the plantar lip of the bone. As you resect cartilage, if a piece of bone/cartilage breaks off as you are removing it, you will not have good bone-to-bone apposition and moreover, it will lead to dorsiflexing of the metatarsal.
Why Prone Positioning Of The Patient Is Ideal For The Medial Displacement Calcaneal Osteotomy
When addressing adult flatfoot, the medial displacement calcaneal osteotomy is one of the more common procedures podiatric surgeons perform to address hindfoot valgus. I prefer to do these procedures with the patient in the prone position. Although it does seem to waste time in the operating room to later flip the patient to the supine position for other foot procedures, I still prefer it. If I have to do a gastrocnemius recession, which is most of the time, then I will have easy access for both. By doing the calcaneal osteotomy with the patient in the prone position, there is less fiddling with shifting of the osteotomy and fixation is a breeze. No more holding the foot up to run your pins and cannulated screws.
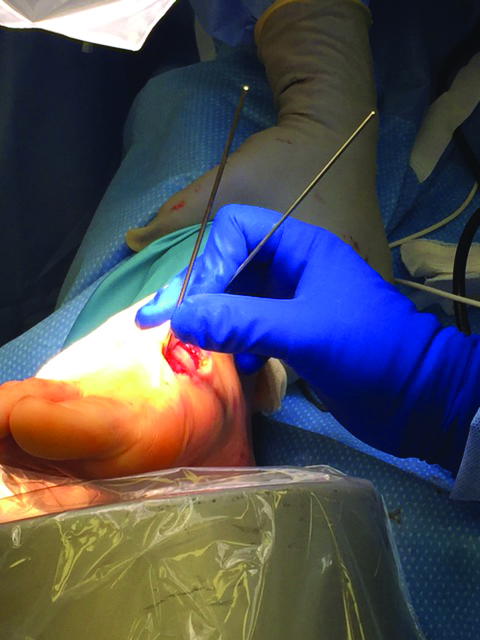
 Additionally, we can employ the fluoroscopy trick I mentioned above. Once you make your oblique skin incision on the lateral heel and dissect down to the periosteum of the calcaneus, use a Weitlaner retractor or two. Now use fluoroscopy to get a ballpark reading of where the osteotomy will be located. Based on that, you can take an osteotome and gently tap into the bone either proximal or distal to the center to make sure your osteotomy will be exactly where you want it (see right photo).
Fixation Tips For The Lapidus Bunionectomy
The Lapidus bunionectomy, historically, has been recommended for larger bunion deformities with excessive mobility of the first ray. In recent times, the popularity of the procedure has exploded because of evidence illustrating how bunion deformities are not just transverse plane deformities but triplane deformities.1
The Lapidus bunionectomy allows frontal plane correction to address the varus attitude of the metatarsal. This varus component contributes to the position of the fibular sesamoid in the interspace. As I mentioned earlier, the joint distractor is a must for joint preparation. I use a device that fits over pins (one distal and one proximal to the fusion site) so there is nothing in the joint that I am preparing. K-wires are too flexible. Use smooth Steinmann pins so there is no bending of the pins. After preparing the joint, remove the distractor and leave the pins in place. Now one can facilitate the correction of the frontal plane deformity by taking the distal pin and rotating it counterclockwise toward the fifth toe.
 With fluoroscopic imaging, you can visualize the metatarsal head rotating and when the intermetatarsal angle is reduced and the metatarsal head is over the seasamoids, you can use temporary fixation to hold it. I prefer to insert a percutaneous K-wire on the plantar medial side of the first metatarsal and advance it into the cuneiform so there is no interference on the dorsal and medial side of the bone where I am going to be placing permanent hardware.
Final Notes
I hope these surgical tips will be of some benefit to you. Certainly, you can expand on these ideas for other applications with other procedures.
Dr. Fishco is board-certified in foot surgery and reconstructive rearfoot and ankle surgery by the American Board of Podiatric Surgery. He is a Fellow of the American College of Foot and Ankle Surgery, and a faculty member of the Podiatry Institute. Dr. Fishco is in private practice in Phoenix.
Reference
1. Dayton P, Feilmeier M, Kauwe M, Hirschi J. Relationship of frontal plane rotation of first metatarsal to proximal articular set angle and hallux alignment in patients undergoing tarsal metatarsal arthrodesis for hallux abducto valgus: a case series and critical review of the literature. J Foot Ankle Surg. 2013;52(3):384-454.


